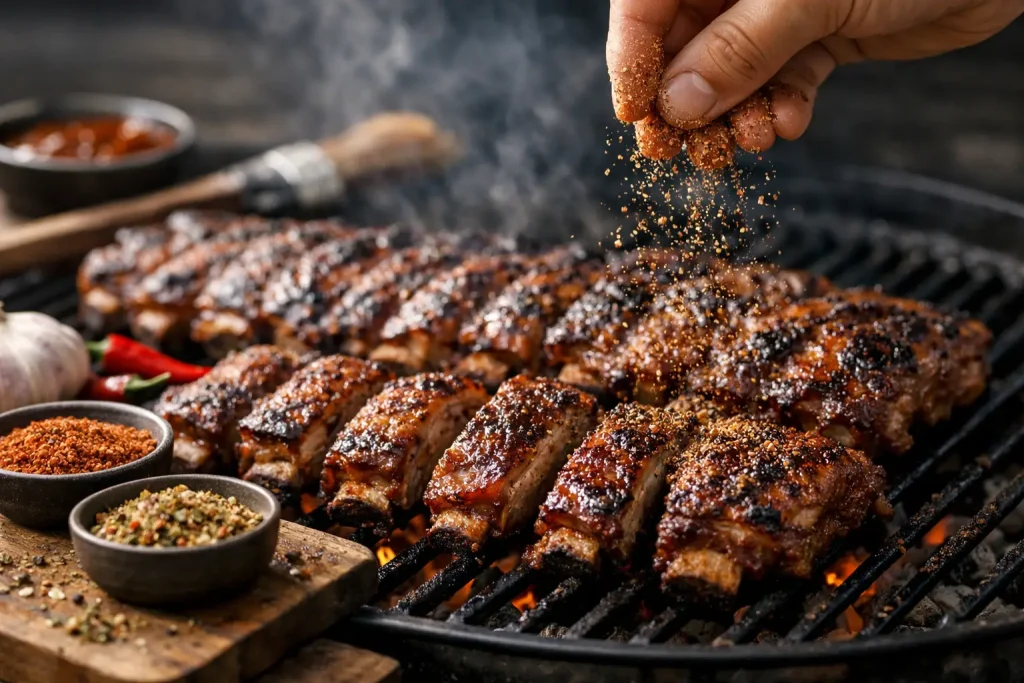
The grill is hot, the ribs are trimmed, and now comes the decision that determines whether dinner tastes merely good or gets talked about long after the plates are cleared: the seasoning. The right seasoning for grilled ribs does more than make the outside taste salty. It builds a savory crust, brings out the richness of the pork, and gives every bite that little hit of smoke, spice, sweetness, or tang that makes you reach for another rib.
Great ribs do not need a cabinet full of random spices. They need a balanced blend, a little patience, and a cooking method that lets the seasoning do its job without burning it away. Whether you like sticky-sweet backyard ribs, peppery barbecue ribs, or a savory dry-rubbed rack with no sauce at all, the details matter.
What Makes a Great Seasoning for Grilled Ribs?
Ribs are rich, fatty, and full of flavor on their own. That is good news for the cook because they can handle bold seasoning. It also means a heavy hand with salt or sugar can quickly take over. The best rib seasoning creates contrast: savory enough to stand up to the meat, sweet enough to encourage a deep caramelized crust, and spicy enough to keep each bite interesting.
Salt is the foundation. It seasons the meat beyond the surface when given enough time, and it helps the pork taste more like pork. Himalayan pink salt brings clean salinity along with trace minerals, while avoiding the harsh, one-note taste that can come from overusing fine table salt.
Black pepper adds more than heat. Its earthy bite cuts through the richness of ribs and becomes especially fragrant over a live fire. Garlic and onion bring the familiar savory backbone that makes barbecue feel full and satisfying. Paprika contributes color and gentle warmth, while smoked paprika can add a campfire note when your grill setup is not producing much smoke on its own.
Then there is the sweetness question. Brown sugar, cane sugar, or a naturally sweet spice profile can help ribs develop that dark, beautiful bark people love. But sugar is a trade-off on a hot grill. It can burn before the ribs are tender, especially over direct heat. If you are grilling fast or cooking close to the coals, choose a seasoning with lower sugar and add a sweet sauce near the end instead.
Pick Your Rib Flavor Direction First
Before shaking on any blend, decide what kind of ribs you want to serve. That one decision keeps the flavors focused instead of muddy.
For classic barbecue ribs, look for a balanced blend with garlic, onion, pepper, paprika, and a touch of sweetness. This is the all-around crowd-pleaser, especially when you plan to finish with a tangy tomato-based sauce.
For Texas-style ribs, lean harder into black pepper, garlic, salt, and chile. Skip the heavy sugar. The result is meatier, more savory, and ideal for cooks who want smoke and pork to stay at the center of the plate.
For a Southwest twist, bring in chile pepper, cumin, coriander, and citrusy notes. These ribs pair beautifully with grilled corn, beans, fresh salsa, and a cold, crisp slaw. A blend with a warm chile profile delivers flavor without forcing you to measure six separate jars over the kitchen counter.
For ribs that do not need sauce, choose a savory blend with enough pepper, garlic, herbs, and smoke-friendly spices to build flavor on its own. A dry rib should still taste complete when you take that first bite. Sauce can be served at the table for anyone who wants it, but it should not be a rescue plan.
At Heath’s Blends, clean, flavor-first ingredients such as organic herbs and spices, non-GMO ingredients, Himalayan pink salt, and no MSG or fillers make it easier to season generously without covering up the food you worked to cook well.
How Much Seasoning to Use on Ribs
Most home cooks under-season ribs because they are afraid of overdoing it. A full rack has a lot of surface area, plenty of fat, and a long cook ahead of it. It can take more seasoning than a chicken breast or a burger.
For a standard rack of baby back ribs, start with about 2 to 3 tablespoons of seasoning. For larger St. Louis-style racks or spare ribs, use 3 to 4 tablespoons. You want an even, visible coating across the top, bottom, and edges without leaving thick piles of seasoning in one spot.
Pat the ribs dry first. Moisture on the surface can make the blend clump and slide around rather than adhere. If you use a binder, keep it light. A thin smear of yellow mustard, neutral oil, or even a little hot sauce can help the seasoning stick, but it should not create a wet layer. The ribs should still look like ribs, not like they have been frosted.
Do You Need to Remove the Membrane?
Usually, yes. The thin membrane on the bone side of a rack can turn chewy and block seasoning from reaching the meat underneath. Slide a butter knife under one corner, grip the loosened membrane with a paper towel, and pull it away in one steady motion. If it tears, start again from another edge.
Some racks arrive with the membrane already removed, and occasionally it is so thin that it is barely noticeable. Check before spending time fighting with it. The goal is a tender bite, not perfection for its own sake.
When to Apply Rib Seasoning
Timing changes the result. Seasoning right before grilling gives you a flavorful exterior and a more pronounced dry-rub texture. Seasoning several hours ahead gives salt more time to work into the meat, which can improve depth and juiciness.
For most racks, season 2 to 8 hours before cooking and refrigerate them uncovered or loosely covered. This window gives the spices time to settle in without making the outside overly damp. If your blend has a lot of salt, stay closer to the shorter end. If it is salt-free or low in salt, you have more flexibility.
Overnight seasoning can work, particularly for large spare ribs, but it depends on the blend. A heavily salted rub may start to cure the meat and create a ham-like texture if left too long. A sugar-heavy blend can also draw moisture to the surface. When in doubt, season in the morning for an afternoon cookout.
Take the ribs out of the refrigerator about 20 to 30 minutes before they hit the grill. You do not need to bring them fully to room temperature. You simply want to take the sharp chill off so they cook more evenly.
Grill for Bark, Not Burnt Sugar
The seasoning needs indirect heat to become a crust instead of a scorched layer. Set up a two-zone grill: coals or burners on one side, ribs on the cooler side. Keep the lid closed as much as possible and aim for a grill temperature around 250 to 300 degrees F.
Baby back ribs often take 3 to 4 hours at that range. St. Louis-style ribs and spare ribs may need 4 to 6 hours, depending on thickness and how steady your grill runs. Time is helpful, but tenderness is the real finish line.
A rack is ready when the meat has pulled back from the bones, the surface has developed a rich color, and a toothpick slides between the bones with very little resistance. If you pick up the rack from one end with tongs, it should bend easily and begin to crack slightly on top. Falling-off-the-bone ribs have their fans, but they are often overcooked. The sweet spot is tender meat that still has a pleasant bite.
If you use sauce, wait until the final 15 to 20 minutes. Brush on a thin layer, let it set with the lid down, then repeat once if you want a stickier finish. Saucing too early is one of the fastest ways to turn a beautiful seasoning crust into a blackened, bitter mess.
A Quick Note on Smoke
Wood smoke and rib seasoning should support each other. Hickory offers a bold, classic barbecue flavor. Apple and cherry wood bring a lighter, slightly sweet smoke that works especially well with sweeter rubs. Mesquite is intense, so use it carefully with pork unless you love a strong smoke profile.
You do not need clouds of smoke pouring from the grill. Clean, light smoke does the best work. Thick white smoke can leave ribs tasting acrid, no matter how good your seasoning is.
Make Every Bite Count
Let the ribs rest for 10 to 15 minutes before slicing. This short pause gives the juices a chance to settle, and it keeps your hard-earned crust from tearing apart as soon as the knife touches it. Slice between the bones, serve with extra sauce on the side, and bring plenty of napkins.
The best grilled ribs are not about following one rigid formula. They are about choosing a seasoning profile you genuinely want to eat, controlling the heat, and giving the rack enough time to become tender. Start with a bold, clean blend, trust your grill, and let that first smoky bite tell you what to try next time.