
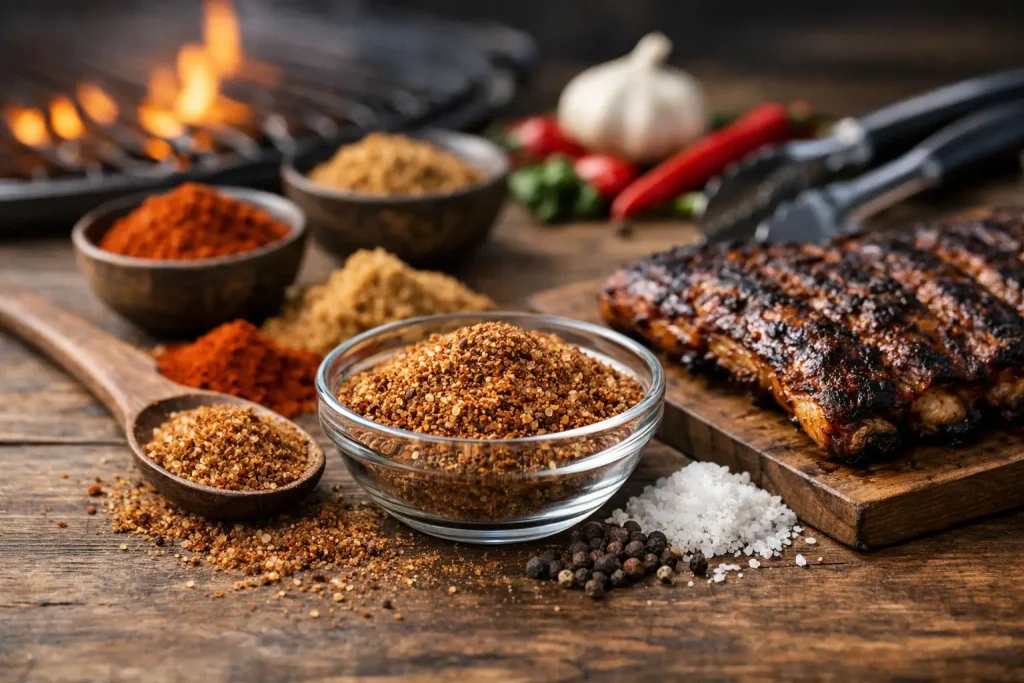
A great dry rub earns its place before the food ever hits the grill. It gives a steak a savory crust, turns plain chicken into a weeknight favorite, and makes roasted vegetables taste like they were planned, not just tossed on a sheet pan. Once you know how to make dry rub, you can build big, dependable flavor from a few clean spices you already enjoy.
The secret is not piling every spice in the cabinet into one jar. A memorable rub has balance: salt for seasoning, sweet notes for browning, savory spices for depth, and enough heat or brightness to keep each bite interesting. Make it to suit the food in front of you, then keep a little extra on hand for the next meal.
What Makes a Dry Rub Work?
A dry rub is a blend of dried herbs, spices, salt, sugar, and sometimes a touch of acidity, such as dry mustard or citrus peel. Unlike a marinade, it does not rely on liquid to flavor the food. It sits directly on the surface, drawing in a little moisture and creating a flavorful exterior as the food cooks.
Salt is the foundation, but it should not take over the whole blend. Kosher salt is easy to measure and distribute, while finely ground Himalayan pink salt brings a clean flavor and beautiful mineral-rich character. Use whichever salt you prefer, but keep grain size in mind. Fine salt tastes saltier by volume than coarse salt, so measure by weight when you want a recipe you can repeat exactly.
Sugar is optional, but it is especially good on pork, chicken, and barbecue-style ribs. Brown sugar adds molasses richness and helps create that deep, caramelized color. The trade-off is that sugar can burn over very high direct heat. For a blazing-hot steak sear, use less sugar or leave it out altogether.
A Reliable Formula for How to Make Dry Rub
Think of a dry rub as a flexible ratio rather than a rule carved in stone. For a generous batch that seasons roughly 4 to 6 pounds of meat or vegetables, start with the following:
- 2 tablespoons kosher salt or finely ground Himalayan pink salt
- 2 tablespoons sweet paprika or smoked paprika
- 1 tablespoon brown sugar
- 1 tablespoon garlic powder
- 1 tablespoon onion powder
- 2 teaspoons black pepper
- 1 teaspoon chili powder
- 1 teaspoon dried oregano
- 1/2 teaspoon cayenne pepper, optional
Whisk the ingredients in a bowl until the color is even and no clumps of brown sugar remain. Taste a tiny pinch. It will be strong and salty on its own, but you should still be able to notice the paprika, garlic, and pepper. If it tastes flat, it usually needs more pepper, garlic, or a bright note such as dry mustard. If it is all heat, add a little more paprika or sugar to round it out.
This base has an easygoing, all-purpose personality. It is right at home on chicken thighs, pork chops, burgers, potatoes, corn, and roasted cauliflower. For a clean-label pantry blend, choose fresh organic herbs and spices when possible and skip products with artificial flavors, fillers, preservatives, or MSG. Simple ingredients have nowhere to hide, so freshness matters.
Start With the Food, Not the Spice Rack
The best rub changes with the meal. Beef can carry bolder black pepper, garlic, and smoky notes. Pork enjoys sweetness, paprika, and a little mustard. Chicken is a friendly canvas for nearly anything, especially herbs, lemony flavors, and mild chile. Seafood needs a lighter hand because its flavor is more delicate and its surface can become overly salty quickly.
For steak, leave out most or all of the sugar and increase coarse black pepper. Add a pinch of ground coriander for warm citrus character. This is the lane for a straightforward salt, pepper, onion, and garlic blend that lets a good ribeye taste like a good ribeye.
For ribs or pulled pork, lean into smoked paprika, brown sugar, chili powder, and mustard powder. A small amount of ground cumin adds earthy depth, while cayenne gives the finish a slow, pleasant warmth. If your barbecue sauce is already sweet, make the rub less sweet so the final plate does not become candy-like.
For chicken and vegetables, try a brighter version with paprika, garlic, onion, black pepper, oregano, thyme, and lemon pepper or dried lemon peel. This kind of blend works beautifully on grilled chicken, air-fried wings, roasted carrots, and a pan of crispy potatoes.
For fish and shrimp, use less salt and sugar, then build flavor with lemon peel, dill, parsley, garlic, black pepper, and a modest pinch of paprika. Skip heavy amounts of cumin and smoke unless you are working with sturdy fish such as salmon. A seafood rub should support the catch, not cover it up.
Apply Dry Rub the Right Way
Pat meat, seafood, or vegetables dry first. Moisture on the surface prevents the rub from sticking evenly and can steam the food instead of helping it brown. Drizzle vegetables with a little oil before seasoning. For meat, a thin coat of neutral oil is optional, but it can help the spices adhere.
Use about 1 tablespoon of rub per pound of meat as a starting point. Smaller cuts such as chicken breasts, pork chops, or shrimp need less time with the seasoning. Larger cuts such as pork shoulder, whole chickens, and racks of ribs benefit from resting longer.
For thin cuts, season 15 to 30 minutes before cooking. For chicken thighs, ribs, or a roast, apply the rub 2 to 12 hours ahead and refrigerate the food uncovered or loosely covered. That rest gives the salt time to season beyond the surface. Do not leave raw meat at room temperature while it rests.
When it is time to cook, avoid rubbing or pressing the food repeatedly. Let the heat do its work. On the grill, begin sugar-heavy rubs over indirect heat when possible, then finish closer to the flame for color. In the oven, a hot roast or broil at the end can help develop the crust without scorching the spices.
Common Dry Rub Mistakes
The most common mistake is using old spices. A jar that has been open for years may still be safe, but it will not bring much aroma to the table. Smell your paprika, pepper, garlic powder, and dried herbs before mixing. If they smell dusty instead of lively, replace them.
Another mistake is treating every pepper as the same. Black pepper is sharp and savory. Cayenne is direct heat. Chipotle brings smoke and heat. Aleppo pepper is fruity and gentler. Choosing the right pepper gives you more control than simply adding more heat.
Finally, do not confuse a dark crust with a burned crust. Paprika, sugar, and herbs can darken quickly. If the outside is getting too dark before the center is cooked, move the food away from direct heat, lower the oven temperature, or finish the cook indirectly.
Store Your Homemade Rub for Fresh Flavor
Transfer the finished blend to a clean, dry jar with a tight-fitting lid. Label it with the name and date, especially if you make more than one version. Store it in a cool, dark cabinet away from the stove, where heat and steam can dull the spices and cause clumping.
For the brightest flavor, use a homemade dry rub within three to six months. It may last longer, but the aromatic oils in herbs and spices fade over time. Make smaller batches if you cook a wide range of foods, or keep one versatile house blend for everyday meals and a few targeted blends for steak, barbecue, and seafood.
There is also no shame in reaching for a ready-made blend when dinner needs to happen now. A thoughtfully made seasoning, such as a pepper-forward S.P.O.G-style blend or a citrusy Peppery Lemon profile from Heath’s Blends, can deliver that same consistency without measuring seven jars on a busy Tuesday. The real win is knowing what flavor you want and getting it onto the plate.
Keep your first batch simple, make one adjustment at a time, and write down the version your family reaches for again. Before long, your grill, skillet, and roasting pan will all have their own signature flavor.